
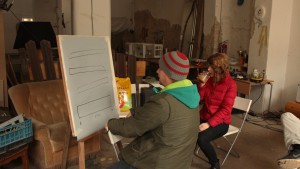
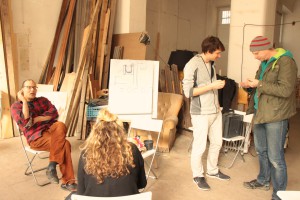
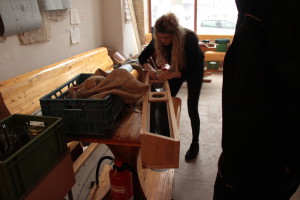
[:de]Letzte Woche traf sich eine der ‚vertikaler Garten’-Gruppen im Baumhaus um den ersten Hydroponik-Prototypen zu bauen. Das Kernteam bestehend aus Sascha, Timo und Diane wurde von Asha, Scott, Uli und Sabine unterstützt. Am Donnerstagabend präsentierten wir der ganzen Gruppe den fast fertiggestellten Prototypen und hörten Feedback dazu. Am Freitag fügten wir dem System Pflanzen hinzu. Jetzt interessieren wir uns für die logistischen Aspekte, d.h. welche Pflanzenarten für den Garten geeignet sind und wie oft diese bewässert werden müssen.
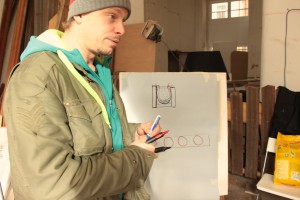
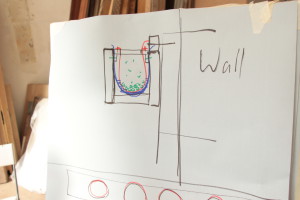
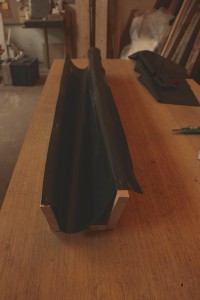
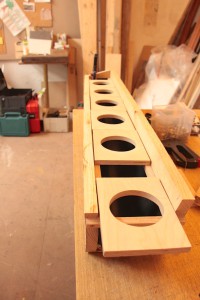
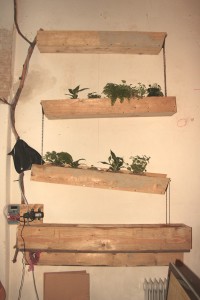
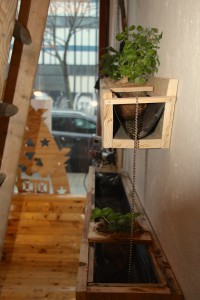
Dieses System trägt den Namen „Waterfall“. Das Grundprinzip dahinter ist, dass Wasser vom Speicher auf das Niveau der Konstruktion gepumpt wird und nachher durch die bepflanzten Bewässerungsrinnen wieder nach unten fließt. Die Pflanzen wurden in Jutesäcken, die mit Seramis gefüllt werden, bepflanzt. Wasser fließt durch das System und wird in die Pflanzbeutel durch die Kapillarwirkung aufgenommen. Ketten verbinden die Bewässerungsrinnen und schleusen das Wasser durch das System.
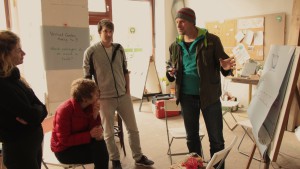

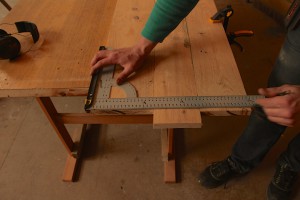
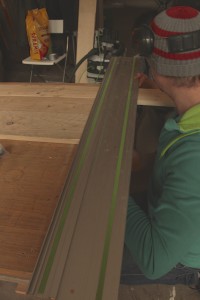
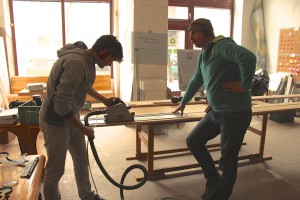
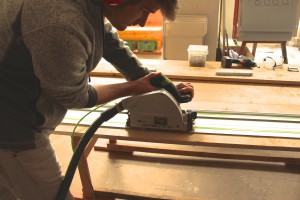
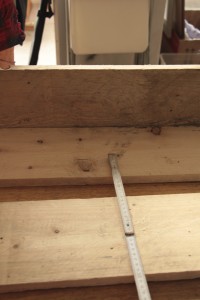
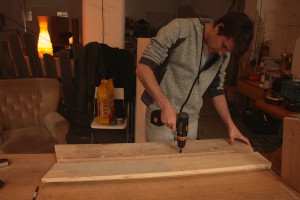
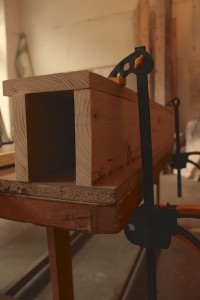
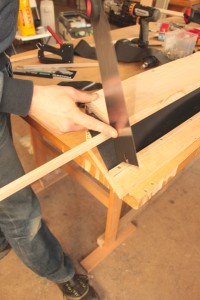
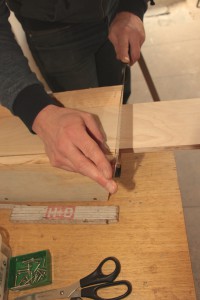
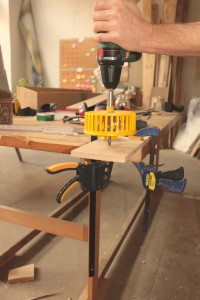
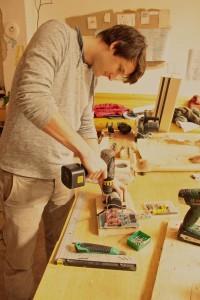
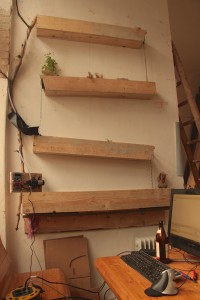
Am ersten Bautag fertigten wir eine Zeichnung unseres gewünschten Prototypen an. Wir sammelten die benötigten Werkzeuge und Materialien. Unseren Prototyp bauten wir aus wiederverwertbarem Holz, der mehrere Male gemessen und auf die richtigen Größe zugeschnitten werden musste. Zuerst mussten wir die Dimensionen der wand abmessen, damit wir die Größe der einzelnen Bewässerungsrenner dementsprechend anpassen konnten. Wir entschieden, dass der Speicher ganz unten breiter und länger als die Bewässerungsrenner gebaut werden muss um Wassertropfen aufzusammeln.

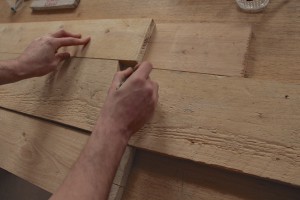
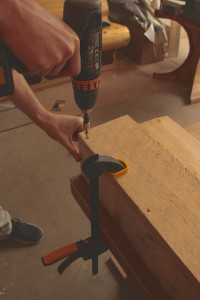
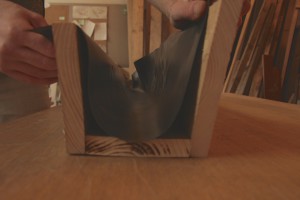
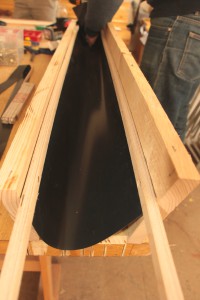
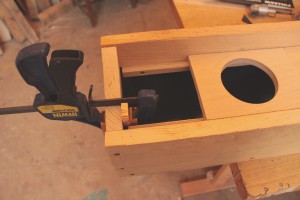
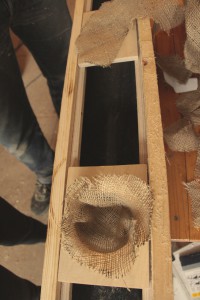
Nachdem wir die Holzstücke geschnitten und zusammen verschraubt hatten, tackerten wir eine Schicht Teichfolie fest. Dadurch konnten die Holzstücke in Form halten, während wir lange, dünne Holzstücke an jede Seiten der Rinne verschraubten. Als Nächstes entfernten wir mit einem Cutter die überschüssige Teichfolie. Diese Holzstücke verschließen die Teichfolie fest und fungieren gleichzeitig als Leiste um die Pflanzbeutel zu halten.

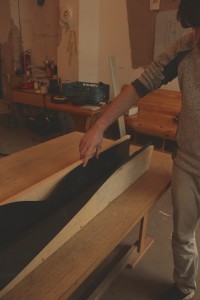

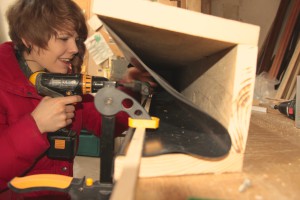
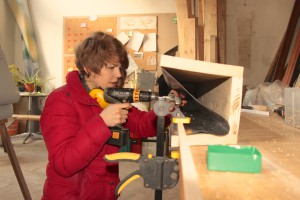
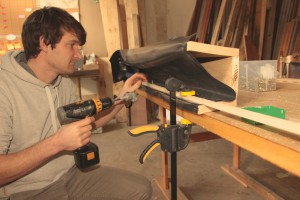
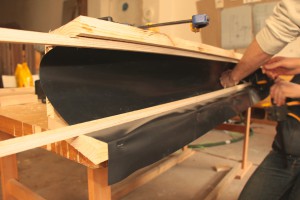
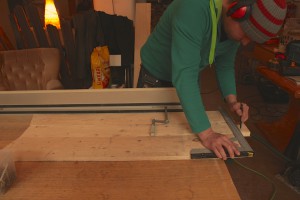
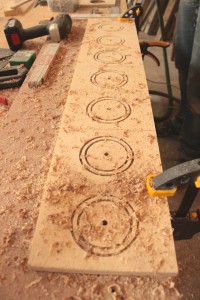
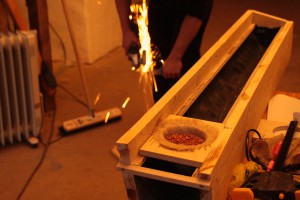
Anschließend erstellten wir die Halter für die Pflanzenbeutel. Wir schnitten ein Holzbrett zu und gelangen dann zum Schluss, dass es am besten wäre, einen einzelnen Halter für jede Pflanze auszuschneiden. Auf diese Weise könnten wir die Lage der Pflanze im fertigen System leichter kontrollieren. Nachdem wir ähnliche Halter für jede Bewässerungsrinne zuschnitten hatten, installierten wir das System an der Wand, fügten die Ketten hinzu und prüften die Pumpe.
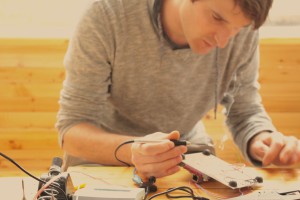
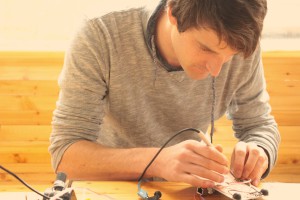
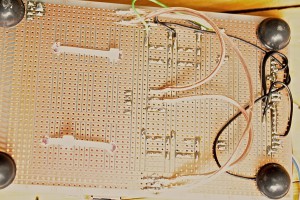
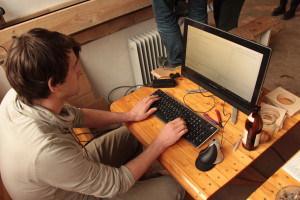
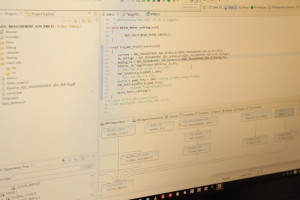
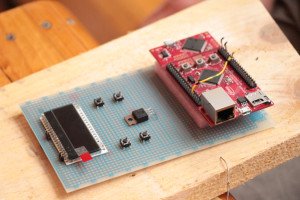
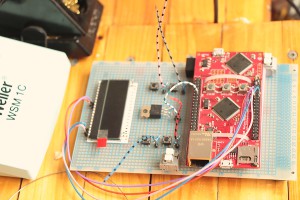
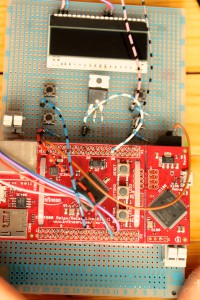
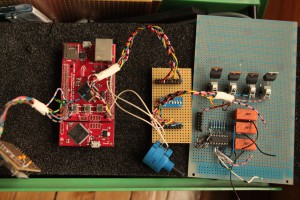
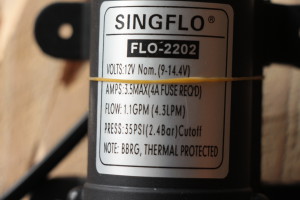
Die Pumpe lief gut. Timo erstellte und programmierte einen Mini-Controller um genau festlegen zu können, wieviel Wasser vom Speicher auf das Niveau der Konstruktion gepumpt werden sollen
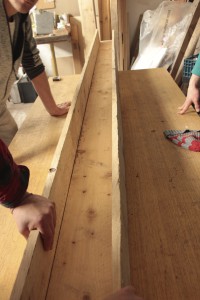
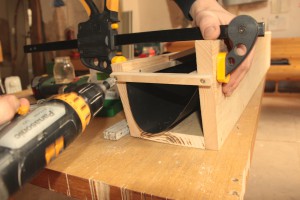
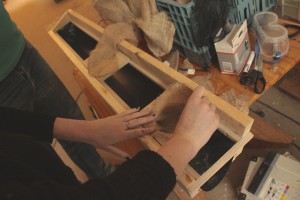
Als letzten Schritt befestigten wir den Jutesack an die Halter und setzten die Pflanzen in die einzelnen Beutel. Beim Befestigen der Beutel war es wichtig darauf zu achten, dass diese mit dem Boden der Rinne in Kontakt traten, ohne dass die den Fluss des Wassers total einschränken würden. Wir stellten die einzelnen Halter in die entsprechenden Rinnen, legten unsere Faust in den Sack durch das Loch im Rahmen und passten die Größe bis zum Boden der Rinne an. Nachdem wir die richtigen Größen der Beutel gefunden hatten, tackertern wir das Material an den Holzhaltern fest und entfernten das überschüssige Material.
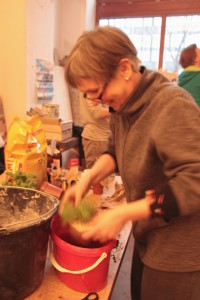
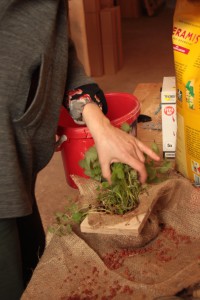
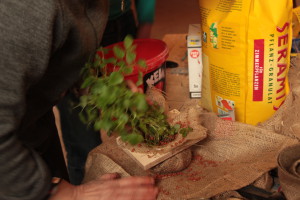
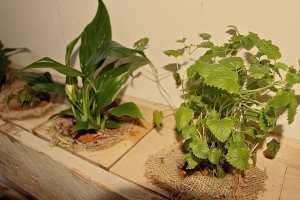
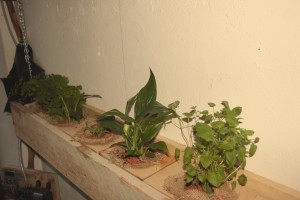
Als die Pflanzenbeutel vorbereitet waren, setzten wir die Pflanzen die Beutel um. Sabine, die sich gut mit Gartenarbeit auskennt, kam zum richtigen Zeitpunkt, um uns beim Umsetzungsprozess zu helfen. Wir entfernten möglichst viel Erde von den Wurzeln der Pflanzen und stellten sie danach ins Granulat. Die Beutel mit den Pflanzen weichten wir einige Minuten ein, sodass die Pflanzen von Anfang an mit ausreichend Wasser versorgt waren. Dann fügten sie ins System hinzu.

Das Projekt vom Start bis ans Ziel zu begleiten, machte mir viel Spaß und ich fand es besonders spannend, den funktionierenden Prototypen zu sehen. Wir haben alle hart daran gearbeitet um unsere Idee in einen funktionierenden Prototypen umzusetzen. Wir sind gespannt, wie wirksam das System läuft, wie es sich verändert, und ob wir es optimieren müssen. Momentan ist der Computer so eingestellt, dass das System jede drei Tage bewässert wird. In den nächsten Wochen werden wir mit den Licht-, Bewässerungs- und Feuchtigkeitsbedingungen experimentieren und das Wachstum der Pflanzen beobachten.[:en]Last week the hydroponic vertical garden team met in the Baumhaus to work on the construction of the first prototype. The core team consisted of Sascha, Timo and Diane with help from Asha, Scott, Uli, and Sabine. By Thursday night we were able to present a mostly-finished prototype to the larger group and get feedback. On Friday we were ready to add plants to the system and are now interested in logistical aspects such as what kinds of plants do well in the vertical garden and how often they need to be watered.
The basic idea behind the system is that water from a reservoir is pumped up to the top and flows down and through angled troughs until it once again reaches the reservoir at the bottom. The plants are set up in burlap sack pouches which contain a granulate material. As water flows through the system water is drawn up into the pouches through capillary action. Each one of the troughs is attached to each other with chains that guide the water from one trough to the next.
On our first day creating the prototype we started out with an illustration of what the finished product should look like and collected the necessary tools and materials. This prototype was created with recycled wood and therefore many of the steps consisted of measuring wood to the correct size. First we considered the size of the wall and how long each individual trough should be. We planned for the reservoir on the bottom to be wider and longer than the troughs to ensure that it would catch all of the water dripping down the system.
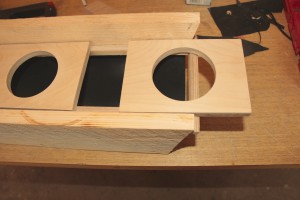
After cutting the wood and screwing it together to fit the desired form we added a layer of waterproof pond liner and secured it with a staple gun. This kept it in place while we screwed a long thin piece of wood to each side of the trough. Afterwards we removed the excess liner with a box cutter. These pieces of wood secure the liner in a more permanently and act as a shelf for the plant holder frames.
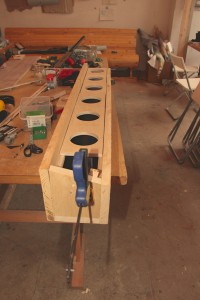
Next, we created the plant holder frames. We cut a board to the correct size and then considered separating the single board into many smaller sections that would hold one to four plants. In the end we decided on cutting it in a way that allowed each plant to have its own board so that we would have more control over the position of each plant and greater access to individual plants in the finished system. After making similar frames for each of the troughs, we installed the system on the wall, added the chains for the water to trickle down and made sure that the pump was working.
The pump worked really well. Timo created a control panel and wrote a program so that you can change the amount of water pumped up to the top of the system and. This gives us control over how much water the plant receives without any extra effort.
The last step was attaching the burlap sack to the boards and then transplanting the plants into the individual pouches. We attached the sack in such a way that the pouch touched the bottom of the trough but still had some room on either side for water to flow through. This was done by setting individual plant frames in their respective troughs, putting our fist into the burlap sack material through the hole in the frame, and then adjusting the pouch size to the particular trough. After it was the correct size, we used a staple gun to secure the material to the frame and cut off any excess material.
After the plant frames and pouches were ready we started transplanting the plants into each of the pouches. Sabine, who is knowledgeable about gardening, showed up at just the right moment to help with the transplanting process. Most of the dirt was removed from the roots and then they were placed in the granulate material. The entire pouch with the plant inside was then soaked for a couple minutes to ensure that the plant started out with enough water. Afterwards they were added to the vertical garden system.
The total material costs for this prototype were 200€. This included all the materials used to make the plant troughs, tank, controller and pump.
Seeing the project through from start to finish was a really fun experience and seeing a working prototype was really exciting too. We all worked really hard to bring the idea into reality as an evolving and functional prototype. We are excited to see how effective the system is and also interested in tweaking the system to make it better. Currently the system is set up to water the plants once every three days. Later this week we will be taking moisture, light, and air exchange measurements as well as monitoring the growth of the plants.[:]